Procreate Negative Space Watercolor Tree Painting Techniques

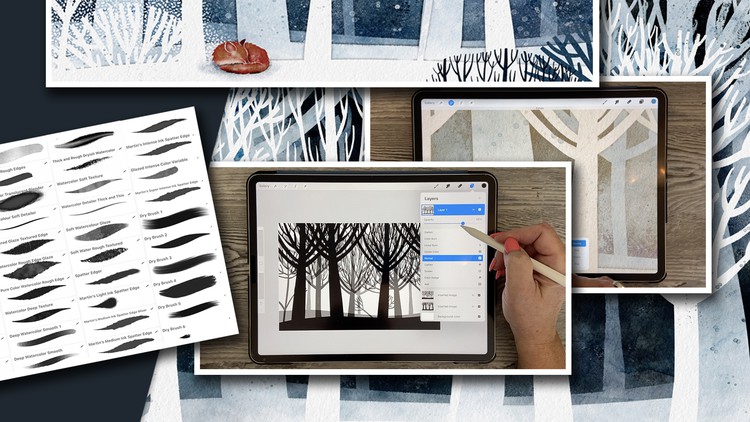
Learn Complex Selections using 25 Watercolour and Texture Brushes Included and Instructions to Make and Edit More

4.00 (1 reviews)
Udemy
platform
English
language
Graphic Design
category
Procreate Negative Space Watercolor Tree Painting Techniques
10
students
1 hour
content
Nov 2021
last update
$19.99
regular price

What you will learn

Students will learn many Procreate functions to create a negative space watercolour painting

Students will learn to use masks in procreate

Students will learnt use Alpa Lock in Procreate

Students will learn complex selection methods to create a negative space watercolour painting

Why take this course?

About This Class

Creating art that speaks to the soul was my inspiration for this class. I have been experimenting with negative space painting techniques for a few weeks now, and I have been incredibly inspired by many of the art pieces I have stowed away on my Pinterest board, Leaves and Trees Illustrated and Photographed. I decided to set my sites on producing a pristine forest scene of which I found numerous great examples.

I know it involves some tricky selections, but I have found that the more I practice this technique, the easier it gets. In this class I endeavour to explain it very thoroughly, and you will discover that it opens many new possibilities for your design work. Negative painting techniques can be applied to so many different mediums! They create such depth that you must try them! I will teach you my layered illustration methodology, tied into the use of brushes to create a layout efficiently. I will even produce a little fox and a deer as a brush! Brush stamps speed up the process, but this can be done without any brush stamps at all, so don’t worry if you hate brush making.

As always, I include a bunch of free brushes and a master document that we use throughout the process to add a lot of interest and make our process as streamlined as possible. In this class, Serene Forest Watercolour Negative Space in Procreate, I take you from start to finish in creating the full illustration with all the little details, including many textures and adding some foreground items. I show you a unique method to create the desired paint pooling inherent to watercolour paintings and show you how to add realistic texturing to the final art. Making complex selections is the focus of the class, but I do break it down thoroughly to make sure you fully understand.

In this class I’ll walk you through:

· my step-by-step method for making selections

· tips for creating compositions using brush stamps

· my workflow for use of layers

· adjusting and combining layer selections to complete the necessary layering

· negative painting techniques

· methods for keeping the art fully editable for later adjustments and recoloring

If you’re looking for new techniques and you have a good basic knowledge of Procreate, you’ll be able to go through all the steps. This class will benefit anyone who wishes to create negative paintings and to improve efficiency with making selections for any purpose.

The key concepts I include:

· making simple and complex selections

· layering to create depth

· unique approaches in your creative work

· adding texture with brushes

· creating unique custom brushes

I really think you will be please by the new things you can do with layer selections. Learning new Procreate techniques is always a step in the right direction. I guarantee you will create something really appealing, and it’s so much fun, once you get the hang of it! Make sure you watch for the follow-up class, Negative Space Forest!

Intro to Serene Forest Watercolour Negative Space in Procreate

This short intro will give you an overview of the class. I will show you a quick clip of the class project example.

Lesson 1: Discussing the Overview and Objectives

In this lesson, I will show you the objectives for class and explain the merits of the technique I use. I walk you through the beginning of planning and show you all the examples I gathered for your inspiration.

Lesson 2: Setting Up Templates and Layering

We start getting to the selections and masks in this lesson. These will help us to create both the layering and depth. I explain the negative painting technique. You will see me use several different mask combinations to create the effects.

Lesson 3: Laying Down the First Layers

In this lesson, I will show you the use of the templates and we will lay down our first layers of color. I show you a few different texture brushes that I will be providing.

Lesson 4: Setting Up Realistic Edge Pooling

This is the lesson in which I teach you my technique for creating pooled edges to make this painting as realistic as possible.

Lesson 5: Experiments in Adding Texture Details

At this stage, we pull our layout together, and I will correct the small details that make it work. I show you a bunch of different ways to add color and texture. Throughout the process you learn much more about selection methods.

Lesson 6: Revisiting Inspirational Examples

This is just a quick interjection of a few more ideas to help jumpstart your creative process for the finishing stage. This will give you so many ideas and will show you just how versatile this technique can be and how valuable experimentation is in your development as a designer.

Lesson 7: Review of My Altered Scenes

I have a bunch of examples to show you at this stage as I pulled my layout togethers, and I will add the small details that make it work. I show you a bunch of different ways to add color and texture and make many other small adjustments. We take a quick look at adding other details and talk about next steps.

Lesson 8: Creating a Whimsical Animal

This is the last lesson and in it I give you a quick run through of creating the little fox for the foreground of our layouts. The silhouette is perfect for creating a brush, which is very versatile. We then use the alpha lock feature to add color and shading to our little guy.

Conclusion and Wrap Up

In this quick wrap-up, I will show you a couple of quick mock-ups that I whipped up. I also give you a few ideas for next steps.

Concepts covered:

Concepts covered include but are not limited to Procreate negative space design, Procreate layouts with brushes, layering, transparency, Procreate brush stamps, making selections, inverting selections, Procreate canvas settings, Procreate snapping and guides, gathering reference and the reference panel in Procreate, Procreate brush creation and embellishing, art licensing, creating original brush stamps in Procreate, the Brush Studio in Procreate, adjusting Procreate brushes, sizing of documents and brushes, compositions with brush stamps, adding texture brush stamps, procreate brushes for adding interest, alpha lock and clipping masks, workflow best practices, painting best practice, Procreate composites, techniques with paints and blending, and much more.

You will get the bonus of…

  • 1 hour of direction from an instructor who has been in graphic design business and education for over 40 years

  • knowledge of multiple ways to solve each design challenge

  • an outline with links to further research

  • a list of helpful online sites to further your education into design

Screenshots

Procreate Negative Space Watercolor Tree Painting Techniques - Screenshot_01Procreate Negative Space Watercolor Tree Painting Techniques - Screenshot_02Procreate Negative Space Watercolor Tree Painting Techniques - Screenshot_03Procreate Negative Space Watercolor Tree Painting Techniques - Screenshot_04

Charts

Price

Procreate Negative Space Watercolor Tree Painting Techniques - Price chart

Rating

Procreate Negative Space Watercolor Tree Painting Techniques - Ratings chart

Enrollment distribution

Procreate Negative Space Watercolor Tree Painting Techniques - Distribution chart
4412704
udemy ID
11/24/2021
course created date
2/3/2022
course indexed date
Bot
course submited by