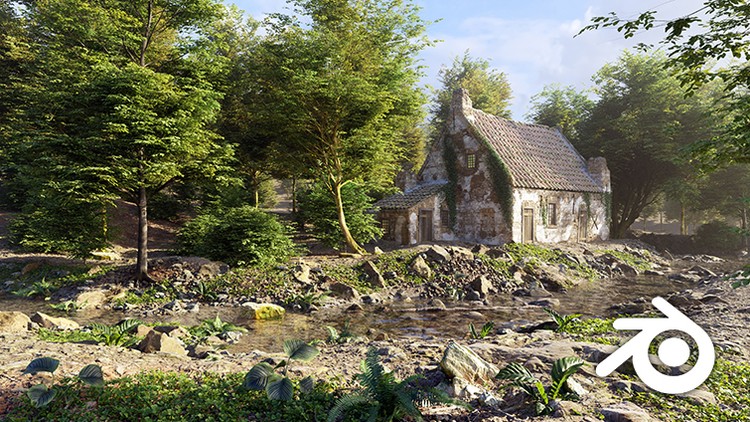
Creating 3D environments in Blender

Learn Blender 3.2, explore Geometry Nodes and create wonderful 3D environments

4.56 (13175 reviews)
Udemy
platform
English
language
3D & Animation
category
instructor
106,698
students
59 hours
content
Dec 2022
last update
$139.99
regular price

What you will learn

Creating stunning unique environments

Learn Blender 3.2

Working with Geometry nodes

Learn the Blender basics

Creating photo-scanned trees

Creating a procedural volumetric sky

Organize your workflow to make large environment scenes

Use 4k /8k PBR textures

Find motivation and inspiration to build your dream scene

Description

This fresh, new Blender 3.2 course update (Version 3.0) contains valuable information for anyone looking to build 3D Environments. If you are new to Blender, it explains all the basics, teaching everything from grass to building creation, from scratch. If you’ve used Blender 2.81, this brand-new course highlights all the new Blender 3.2 features you can use to create amazing 3D environments.


Create beautiful 3D environments

Creating 3D environments is now more popular than ever, with a growing number of people mastering the skill of 3D crafting. Whether you are just starting out or already quite experienced, creating 3D environments can be a time-consuming and complex craft. During my 15 years creating these environments, I have faced and overcome many challenges. Having discovered the beauty and joy of 3D crafting, I now love nothing more than sharing my passion and wealth of experience with others. I hope this course sets you on the path to designing your own dream environment entirely in 3D.


Learn everything from A to Z

When I started 3D modeling, the only learning source I had was a printed book on random modeling. For me, it was enough to learn the basics, but without guidance, it’s easy to get lost. Today, there are many online learning resources that offer a swifter path to success in this field. However, not all offer a complete A to Z on 3D crafting. That’s why this 3D environment course is especially designed to cover everything you need to know to create stunning environments.


Step-by-step guidance

Discover everything you need to know to create your own 3D environments. Even if you have never touched Blender before, this course offers step-by-step guidance to help you with the basics so that you can feel comfortable using the software.


With 30+ hours of video content, this course takes you from complete beginner to proficiency.

Best of all, it’s completely up to date. I developed the first version of this course in 2015 and I continually update and improve the content. In 2020, Version 2.0 covered the new Blender 2.8 UI, but the latest Blender 3.2 update meant it was time for another major overhaul. Version 3.0 has fully updated course material recorded in Blender 3.2, so you can follow along with ease.


What will you learn in this course?

· Blender basics, just enough to follow this course (fully documented with handbook)

· Creating grass (Geometry nodes )

· Creating trees (Geometry nodes )

· Building a ruined landscape

· Blending displaced materials

· Creating a river scene

· Creating a procedural sky with clouds

· Working with photo scanned structures

And much more!


What included in this course?

As always, I offer a course full of content, this time it’s bigger than ever. The course uses free content from the Polyhaven CC0 platform, which I started with Greg Zahl in 2018 to provide textures, models and HDRi’s for everyone to use. Simply go and pick the assets you like. A selection of 4K textures and models are included in the course, but feel free to download up to 16K from the Polyhaven platform.


You’ll also receive exclusive content you won’t find on Polyhaven:

· Photo-scanned rocks, tree barks, wooden beams, plants, ruins and a castle

· Photo references (landscapes, buildings, flowers)

· 125 pages of documentation for the introductory chapter

· All Blender scene files (Blender 3.2).


Chapter overview


Chapter 1: Course introduction

A short introduction what you will learn in each chapter. Also, some explanation about workflow and organization, motivation and inspiration and course related questions. (Now available)

Chapter 2: Blender basics

This chapter learns you the Blender fundamentals. If you are new to Blender, this chapter helps you on track with a quick introduction of the interface and viewport and some of the most used tools. We also build a simple table/chair scene and build a dice scene with geometry nodes. This chapter comes with 125 pages of documentation. (Now available)


Chapter 3: Creating a grass scene

In this chapter we start with making grass strands. We pack the strands in Geometry nodes and build a simple but realistic grass scene with the geometry Nodes system. We use proxy models to speed up the viewport and add some variation by modeling some flowers. In the end of this chapter, we animate the grass so you can render the scene in motion. (Now available)


Chapter 4: Creating a forest path scene

Big topic in chapter 4 is tree creation. We use photo-scanned barks in combination with generated branches. We add twigs on the branches with the geometry nodes and provide this with an animation. We upgrade the grass template by adding a path generator so you can simply adjust the scene by drawing a path. (Now available)


Chapter 5: Creating a ruined scene

In this chapter we use the grass template and trees from the previous chapter and spend most of the time on the ruin structure. We build an advance material node to blend a brick and plaster material. We also model some bricks and scatter these on the structure with Geometry nodes.  (Now available)


Chapter 6: Farmhouse river scene

This course comes with lots of scanned rocks, this chapter is the ultimate scene to blend all the rocks to make a river scene. First we shape the terrain so we have a river bed. Most of the lectures cover the creation of the farmhouse. , this is the main structure of the scene. In the end of the chapter we scatter the river with rocks and animate the river. (Now available)


Chapter 7: Sunset castle scene

This time we use a photo-scanned castle and blend the structure with the terrain. We build a sky with volumetric clouds and use the Nishita skylight to blend the sky to create a sunset. (Now available)


Chapter 8: Mountain ruin scene

This large landscape combines all the best from all chapters. We use the grass, trees and path to create a mountain path. We fill the scene with scanned ruin structures and blend the sky with distance mountains.onderful environmental scene. All content and textures come from Texture/HDRI Haven and are included in the course.  (Now available)


Chapter 9: Medieval urban scene

This chapter can be seen as a course in itself. This chapter contains the complete workflow to model a medieval street scene. This medieval scene is based on the original 2014 scene and was re-designed for this new 3.0 version of the course. (Scheduled  March 1st 2023)


About me

My name is Rob Tuytel and I have been a environment designer for the past 16 years. I have a huge passion for the Dutch 17th century and mainly focus on medieval architecture. I am Co-Founder of Polyhaven together with Greg Zahl. I love to study old environment paintings and use these as an inspiration for my work. You might know me from the Tears of Steel open Blender movie or from my previous environment course for Blender 2.81.

Content

Chapter 01 - Before we start (2.81)

Lekture 01 - Course overview
Lecture 02 - Udemy Dashboard
Lecture 3 - Techniques from the old masters (2.81)
Lecture 4 - Motivation and inspiration
Lecture 5 - Workflow and organization

Chapter 02 - Getting in touch with Blender (2.81)

Lecture 01 - introduction
Lecture 02 - Download and installing Blender 2.81
Lecture 03 - Getting in touch with the blender viewport
Lecture 04 - The Blender 3D interface
Lecture 05 - Collections
Lecture 06 - Eevee and Cycles
Lecture 07 - The workbench
Lecture 08 - Creating a simple object
Lecture 09 - Making a dice
Lecture 10 - Adding dice holes
Lecture 11 - Adding a material
Lecture 12 - Improving dice material
Lecture 13 - Making a scene render

Chapter 03 - Working with materials (2.81)

Lecture 01 - Introduction to materials (2.81)
Lecture 02 - Materials in the real world
Lecture 03 - Materials in 3D scenes
Lecture 04 - Building a material setup sphere
Lecture 05 - Making colors with color ramp node
Lecture 06 - Mixing image textures
Lecture 7 - Mix plaster on the bricks
Lecture 08 - Add sandstone border
Lecture 09 - Add displacement and weight layer
Lecture 10 - Optimizing node tree in groups
Lecture 11 - Adding background images
Lecture 12 - Building the wall
Lecture 13 - Using the boolean modifier
Lecture 14 - Remesh the wall
Lecture 15 - Adding wall material
Lecture 16 - Adding displacement map
Lecture 17 - Adding weight layer sandstone
Lecture 18 - Making a render
Lecture 19 - recap

Chapter 04 - Making a grass landscape (2.81)

Lecture 01 - Introduction
Lecture 02 - Making a scene template
Lecture 03 - deform the landscape
Lecture 04 - Importing the wall model
Lecture 05 - Adding landscape material
Lecture 06 - Adding landscape displacement
Lecture 07 - Importing HDRI map
Lecture 08 - Adding grass strand backplate
Lecture 09 - Model a grass strand
Lecture 10 - Adding strand details
Lecture 11 - Adding strand texture
Lecture 12 - Making strand variations
Lecture 13 - making a grass clump
Lecture 14 - making clump variations
Lecture 15 - Convert grass clump
Lecture 16 - Adding grass material
Lecture 17 - adding terrain displacement
Lecture 18 - Adding grass particle system
Lecture 19 - improving grass looks
Lecture 20 - adding particle texture
Lecture 21 - grass color variation
Lecture 22 - Modeling small reed
Lecture 23 - modeling reed variation models
Lecture 24 - Adding reed particle system
Lecture 25 - Adding fog
Lecture 26 - Mixing grass length
Lecture 27 - Adding grass on the ruin
Lecture 28 - Making scene improvements
Lecture 29 - Recap

Chapter 5 - Making a farm house landscape (2.81)

Introduction Lecture
Lecture 01- Making a scene template
Lecture 02 - making a scene blockout
Lecture 03 - Starting with the farmhouse
Lecture 04 - Adding roofs
Lecture 05 - Extending roof
Lecture 06 - adding holes
Lecture 07 - Adding bevels
Lecture 08 - Making wooden bars
Lecture 09 - Placing wooden bars
Lecture 10 - adding roof and brick texture
Lecture 11 - Adding texture variation
Lecture 12 - Adding leaking texture
Lecture 13 - Adding more leaking
Lecture 14 - Making a window
Lecture 15 - Adding texture and frame
Lecture 16 - Merging window frames
Lecture 17 - making window frame variations
Lecture 18 - Merging windows with house
Lecture 19 - making a door
Lecture 20 - adding roof sealings
Lecture 21 - Adding roof slates
Lecture 22 - Adding roof slates on small roofs
Lecture 23 - Creating a door hook
Lecture 24 - Improving texture details
Lecture 25 - improving building materials
Lecture 26 - Importing house in scene
Lecture 27 - Adding grass weight layer
Lecture 28 - Importing grass
Lecture 29 - Modeling dead leaves
Lecture 30 - Adding dead leaves material
Lecture 31 - adding dead leave particle layer
Lecture 32 - making a tree with the sapling tool
Lecture 33 - generating a birch tree
Lecture 34 - Adjusting the root
Lecture 35 - Adding weight layer branches
Lecture 36 - Modeling birch leaves
Lecture 37 - Merging leaves on twig
Lecture 38 - Adding twigs on tree
Lecture 39 - Updating twig material
Lecture 40 - Making more birch trees
Lecture 41 - fixing the root
Lecture 42 - Importing the trees
Lecture 43 - Adjusting the twig material
Lecture 44 - Adding scene fog
Lecture 45 - Adding grass variation
Lecture 46 - Modeling reed
Lecture 47 - making the reed curvy
Lecture 48 - merging leaves on the stem
Lecture 49 - Adding reed particles
Lecture 50 - Adding small reed
Lecture 51 - Adding path on terrain
Lecture 52 - Making scene adjustments
Lecture 53 - Scene compositing
Final Lecture - Recap

Chapter 06 - Creating nature assets (2.81)

Lecture 01 - Introduction
Lecture 02 - Importing assets from previous scenes
Lecture 03 - Importing trees
Lecture 04 - Modeling nettle leaves
Lecture 05 - Modeling more nettle leaves
Lecture 06 - Adding nettle texture
Lecture 07 - Curvy leaves and modeling a nettle stem
Lecture 08 - merging leaves with nettle stem
Lecture 09 - making nettle variation
Lecture 10 - Modeling celandine plant
Lecture 11 - Curve the celandine
Lecture 12 - Modeling celandine flower
Lecture 13 - Merging the leaves and the stem on the flower
Lecture 14 - Improving celandine flower
Lecture 15 - Modeling plant leave
Lecture 16 - Modeling plant stem and merging leaves
Lecture 17 - Improving plant material
Lecture 18 - making dry grass
Lecture 19 - Modeling Ivy leave
Lecture 20 - Building Ivy Branch
Lecture 21 - Improving Ivy material
Lecture 22 - Modeling field maple leave
Lecture 23 - Making leaves curvy
Lecture 24 - Modeling field maple twig
Lecture 25 - making twig variations
Lecture 26 - Generating field maple tree
Lecture 27 - Adding trunk texture
Lecture 28 - Adding twigs on tree
Lecture 29 - Organizing trees
Lecture 30 - recap

Chapter 07 - Making a castle scene (2.81)

Lecture 01 - Introduction
Lecture 02 - Organizing scene template
Lecture 3 - deforming the terrain
Lecture 04 - Modeling castle blockout
Lecture 05 - Modeling castle tower
Lecture 06 - Adding holes and remesh
Lecture 07 - Improving the towers
Lecture 08 - Optimizing towers and improving materials
Lecture 09 - Adding more texture layers
Lecture 10 - Mixing texture layer towers
Lecture 11 - Adding sandstone borders
Lecture 12 - Adding roofing texture
Lecture 13 - Improving roof texture
Lecture 14 - modeling a window frame
Lecture 15 - Making window variations
lecture 16 - Modeling a sandstone window frame
Lecture 17 - Merging windows with towers
Lecture 18 - Modeling sandstone border for the tower
Lecture 19 - Modeling the main structure base
Lecture 20 - Modeling the broken walls
Lecture 21 - Adding gun holes
Lecture 22 - Addin g more gun holes
Lecture 23 - Improving textures
Lecture 24 - Adding holes in the main structure
Lecture 25 - remesh the main structure
Lecture 26 - Adding sandstone texture window layers
Lecture 27 - Adding sandstone door texture layer
Lecture 28 - Importing window frames
Lecture 29 - Adding metal frames
Lecture 30 - Modeling wall borders
Lecture 31 - Adding extra walls
Lecture 32 - Adding roof texture
Lecture 33 - Modeling roof slates
Lecture 34 - Modeling roof bars
Lecture 35 - Modeling a small roof
Lecture 36 - Making a roof sealing
Lecture 37 - Modeling a hatch
Lecture 38 - Merging hatches with the building
Lecture 39 - Adding wall displacement
Lecture 40 - Improving main structure
Lecture 41 - Adding terrain displacement
Lecture 42 - Adding path vertex layer
Lecture 43 - Improving terrain
Lecture 44 - Adding grass particle system
Lecture 45 - Importing nature assets
Lecture 46 - Adding small plants
Lecture 47 - Adding small reed
Lecture 48 - Importing trees
Lecture 49 - Improving grass and importing hdri sky
Lecture 50 - Adding weight layer towers
Lecture 51 - Adding ivy branches
Lecture 52 - Adding tall reed and water leaves
Lecture 53 - Finalize scene
Lecture 54 - Recap

Chapter 1 - Before we start

Course overview
Udemy dashboard information
Techniques from the old masters
Motivation and inspiration
Workflow and organization

Chapter 2 - Introduction to Blender and Setup

Chapter_2_introduction
Installing Blender
Getting in touch with Blender
The Blender 3D interface
Creating a simple object
Blender quick tools
Creating a chair
UV Coordinates
Advance UV coordinates
Modifiers
Modifiers part 2
Making a fence
Making a viewport render
blender basics test
Chapter_2_recap

Chapter 3 - Materials

Chapter_3_introduction
Materials in the real world
Materials in 3d scenes
Building a test scene
Making a material with nodes
Mixing Shaders
Principled shader
Advance material design
Advance material design (2)
Advance material design (3)
The node wrangler
Translucency
Making a leave material
Pointiness
Updating the fence
Updatring the fence (2)
Updating the fence (3)
Chapter_3_recap

Chapter 4 - Create a simple building

Introduction_chapter_4
Making a base
Optimizing base
Adding window holes
Making a window frame
UV unwrap window frame
Front framework
Front framework (2)
Extending the roof
Base texture
Base material setup
Adding windows
Making a door
Door ornaments
Making a hatch
Adding door/hatches
Adding hatches/windows
Window ornaments
Roof texture
Roof ornament
Making a chimney
Roof improvements
Improving materials
Make a render
Plaster material ( bonus / optional )
Low poly model ( bonus/optional )
Baking texture maps ( bonus/optional )
Baking texture maps 2 ( bonus/ optional)
Blender to Unity 3D ( bonus / optional)
Recap_chapter_4

Chapter 5 - Create advance buildings

Chapter_5_introduction
File organization
Making the base
Adding holes
Adding bevel lines on the edges
Building the front frame
Creating ornaments
Making an advance door
Adding door and ornaments
Adding hatches
Adding windows
Improving window ornaments
Adding middle framework
Adding more windows
Making top roof sealing
Adding roof tilles
Adding texture for the rear of the building
Improving textures
Advance plaster material
Improving textures
Adding roof sealing
Side ornaments and sealings
Updating all the materials
Final details
Append and improve the chimney
Making a low poly model (Optional)
Baking texture maps (optional)
Import building into unity 3D (optional)
Making a new advance building design
Making a side roof
Adding roof tiles and sealing
Adding roof in library files
Creating base for new building design
Creating hole shapes for the window and doors
Adding bevel lines and optimization
Adding textures
Concrete window frames
Mixing plaster
Sandstone corners and sealings
Adding brick arches
Improving the side texture
Adding roof tiles
Adding windows
Making a top roof
Improving the roof tiles
Updating the materials
Chapter_5_recap
Making a church - modeling the base
Making a church - Improving the block model
Making a church: Side portals and roofing
Making a church - Adding holes in the tower
Making a church - improving the front tower
Making a church - Adding side windows
Making a church - Adding the rear windows
Making a church - Working on the window texture
Making a church - Arch modeling
Making a church - improving the wall texture
Making a church - Adding more detail top tower
Making a church - Adding side window textures
Making a church - Adding rear windows textures
Making a church - Improving the side portal
Making a church - Border and roof textures
Making a church - making a church pillar
Making a church - Sandstone details pillar
Making a church - Improving pillars by adding detail
Making a church - Duplicating church pillars
Making a church - Creating a wall border
Making a church - Creating tower ornaments
Making a church - Making tower pillar ornaments
Making a church - Adding small planks in tower
Making a church - Making small pinnacles
Making a church - Adding an extra side portal
Making a church - Side portal part 2
Making a church - Adding final details

Chapter 6 - Nature

Chapter_6_introduction
Taking a closer look at grass
Introduction to grass, modeling strands
Joining the grass strands
Grass material settings
Grass variation: Creating weeds
Grass variation: Adding flowers
Making a grass field
Collors of the forrest
Creating a Rock/Boulder
Adding a texture to the rocks
Adding the rocks on the grass field
Getting_outside_Trees
Creating a tree
Trees: Creating a twig
Trees: Improving the twigs
Trees: Generating the tree with The grove 3D
Adding the tree to the grass field
Extra: Animations
Chapter_6_recap

Chapter 7 - Road and paths

Chapter_7_introduction
Getting_outside_paths
Creating a path in your scene
Change the color of the path
Adding puddles on your path
Creating a cobblestone road
Adding pebbles on the sand path
Chapter_7_recap

Chapter 8 - Light and atmosphere

Chapter_8_introduction
Basics of light
Using sunlight
Working with environment textures
Volumetric mist/atmosphere
Extra snow scene
Chapter_8_recap

Chapter 9 - Creating a scene from scratch

Chapter_9_introduction
Scene introduction
Making a scene base
Adding textures
Making a canal border
Appending the building assets
Making a Gate [A]
Making a gate [B]
Adding the cobblestone path
Adding grass and making a small structure
Adding environment texture
Adding street props
Making trees [A]
Making trees [B]
Improving function of buildings in the scene
Adding ivy
Improving the gate [A]
Change a building [B]
Making a canal fence
Improving the canal
Adding street_props [A]
Adding street props [B]
Improving scene objects [A]
Improving scene objects [B]
Add leaves and flowers on the path [A]
Add leaves and flowers on the path [B]
Apply leaves and flowers on the path
Making a render and use the compositor
Improving the scene by making changes in the scene
Chapter_9_recap

Chapter 10 - Final review + tips & tricks [Bonus]

Chapter_10_part_1
Chapter_10_part_2
Chapter_10_part_3
Chapter_10_part_4
Chapter_10_part_5
Chapter_10_part_6
Chapter_10_part_7

Screenshots

Creating 3D environments in Blender - Screenshot_01Creating 3D environments in Blender - Screenshot_02Creating 3D environments in Blender - Screenshot_03Creating 3D environments in Blender - Screenshot_04

Reviews

Mathieu
November 9, 2023
So far so good everything is explained very well so i'm looking forward to making some awesome 3D environments
Christian
November 4, 2023
Very good explanations also for beginners. Everything could easily repeated with amazing results. The course contains a ton od resources that help to start and even gives a help to find more references and resources for own projects. As the course was updated with the blender version 3.x it has even more benefit for me.
Kale
October 25, 2023
So far there's a lot more self-narration than teaching. The instructor often moves very quickly with minimal explanation and there seems to be a language barrier that makes keeping up difficult. I see the passion is there and the instructor is VERY knowledgeable in Blender. But I believe he just has a hard time communicating his knowledge in a slow methodical manner.
Ron
October 20, 2023
I requested a refund at the beginning of this course because it had errors and it is awful. Why do I still have it?
Petr
October 18, 2023
Awesome course which teches you to creat facinating landscapes. However, for the best result you will need a quite powerful PC
Scis
September 10, 2023
講座に用いられている動画の時間が非常に長く、修了までに半年近くかかったがその分学習効果は非常に高く植物や建物、地形、大気といった環境モデリング制作はこちらの講座だけで一通り学ぶことができた。 また、Blenderの学習といえばモデリングが中心となるがこちらの講座はジオメトリノードの使い方も重視されており、道の変位やオブジェクトの分布を細かく調整するシステムの作成方法も含まれている。 このジオメトリノードはBlender2.92から導入された比較的最近の機能であるせいか解説しているサイトが少ない為本講座にて学習できる機会が得られたのは非常に有意義であった。
KAUSHIK
September 6, 2023
You just wrote the system requirements 16gb ram but didnt mention about the cpu geometry node take a lot of cpu usage
Lili
September 1, 2023
Really informative, I like that I always see the keyboard info. Sometimes the steps are a bit too fast.
Devin
August 19, 2023
Get to create a bunch of scene props, learn procedural generation adding randomness. Putting all this cool stuff together to make amazing landscapes. Getting a lot of practice using blender while doing the course. What a great program and what an amazing Course. It's a lot of fun.
Negga
August 19, 2023
excellent lecture, well explained and very important and useful information delivered in a nice and inspiring way.
Ryan
August 18, 2023
So far so good. Learning a lot about Blender. I have experience with Maya and 3dsMax so that does help some when it comes to problem solving but a beginner should be able to latch on and follow nicely as well.
Simon
August 12, 2023
The degree of difficulty of the course was declared as "all levels". For me as a beginner it is impossible to follow after a certain point. The selection and arrangement of the nodes seems totally random, often doesn't make sense and ends up in blind copying. It is also a fact that I have already been able to create environments in other tutorials without complicated geometry nodes. It's very frustrating that Geometry Nodes are used for every environment here.
Donna
August 2, 2023
Loving this course and if I'm to be honest I never thought I would be able to grasp it at all. I don't normally have a good attention span when it comes to watching video lectures so was pleased to find that there is also a pdf for it just incase (never needed to use it yet). I do repeat each exercise a few times so I get to remember things better and gain a better understanding of what I'm doing. I can't wait to learn more and create little projects of my own.
Robin
July 29, 2023
As someone with a beginner level skill set wanting to gain enough knowledge about 3D environment building to create your own, this is one course I would highly recommend. It's not only about recreating scenes, but also giving you as a student the skills and tools you need for your own projects. I also really enjoy the enthusiasm of Rob. The only thing I really missed was a more organised system for the geometry nodes. Grouping and naming them more clearly, especially for future use. Sometimes as a student it's hard to remember exactly what node did what and why. This could have been easily solved with proper naming and grouping beyond the standard coloring.
Ana
July 11, 2023
Los subtítulos son automáticos, pero se entiende bien. Por lo general me parece un curso muy completo.

Charts

Price

Creating 3D environments in Blender - Price chart

Rating

Creating 3D environments in Blender - Ratings chart

Enrollment distribution

Creating 3D environments in Blender - Distribution chart
683198
udemy ID
11/28/2015
course created date
8/29/2019
course indexed date
Bot
course submited by